
How to Prepare Pizza Margherita: The Classic Italian Pizza Recipe

How to Prepare Pizza Margherita: The Classic Italian Pizza Recipe
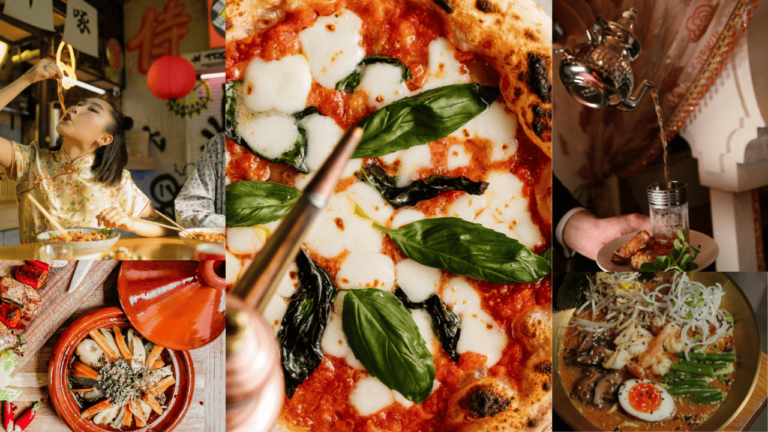
Pizza Margherita is the quintessential Italian pizza, beloved for its simplicity and fresh ingredients. With its crispy crust, tangy tomato sauce, creamy mozzarella, and fragrant basil, it’s the perfect example of how a few high-quality ingredients can come together to create something truly special. Whether you’re a pizza pro or a first-time maker, this step-by-step guide will help you create a classic Margherita pizza in your own kitchen!
Ingredients for Pizza Margherita:
For the Dough.
- 2 ½ cups (320g) all-purpose flour (plus extra for dusting)
- 1 teaspoon salt
- 1 teaspoon sugar
- 1 tablespoon olive oil
- 1 packet (2 ¼ teaspoons) active dry yeast
- 1 cup (240ml) warm water (110°F/43°C)
For the Toppings:
- 1 cup (240g) tomato sauce (preferably San Marzano or other high-quality crushed tomatoes)
- 8 oz (225g) fresh mozzarella (preferably buffalo mozzarella)
- Fresh basil leaves (a handful)
- 2 tablespoons extra virgin olive oil
- Salt and pepper to taste
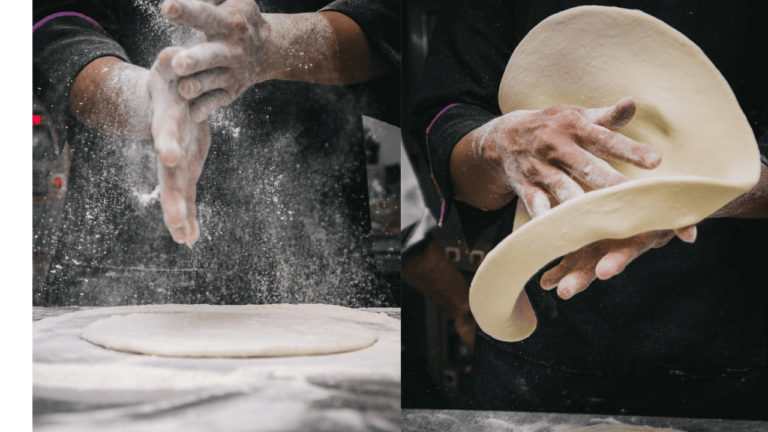
Step 1: Prepare the Pizza Dough
https://ladycooking.com/2025/01/06/how-to-prepare-prepare-pizza-dough/

- Activate the Yeast:
- In a small bowl, combine the warm water and sugar. Sprinkle the active dry yeast over the top, stirring gently to dissolve. Let it sit for about 5 minutes until it becomes frothy and bubbly. If it doesn’t foam, the yeast might be expired, and you should start with fresh yeast.
- Mix the Dough:
- In a large mixing bowl, combine the flour and salt. Create a small well in the center, then pour in the activated yeast mixture and olive oil. Mix with a spoon until a rough dough forms.
- Knead the Dough:
- Transfer the dough onto a floured surface and knead it for about 8–10 minutes, until it becomes smooth and elastic. If the dough is too sticky, add a little more flour as you knead. When ready, form the dough into a ball.
- Let the Dough Rise:
- Place the dough ball in a lightly oiled bowl and cover it with a clean kitchen towel or plastic wrap. Let it rise in a warm place for about 1–1.5 hours, or until it doubles in size. If you’re short on time, you can also let it rise overnight in the fridge for more flavor.

Step 2: Preheat Your Oven
- Preheat your oven to 475°F (245°C). If you’re using a pizza stone, place it in the oven while it preheats for a crispier crust.

Step 3: Shape the Dough
- Punch Down and Roll:
- After the dough has risen, punch it down gently to release the air. Transfer it to a floured surface and roll it out with a rolling pin. Aim for about a 12-inch (30cm) circle, or you can stretch it out by hand for a more rustic look. If the dough resists stretching, let it rest for a few minutes before continuing.
- Transfer to a Baking Sheet or Pizza Stone:
- If you’re using a baking sheet, lightly flour it and transfer the dough. For a pizza stone, sprinkle it with flour or cornmeal before transferring the dough to prevent sticking.

Step 4: Add the Toppings
- Tomato Sauce:

Spread a thin layer of tomato sauce over the dough, leaving a small border around the edges for the crust. Use a spoon to evenly distribute the sauce.
- Mozzarella:
Tear the fresh mozzarella into small pieces and scatter them evenly over the sauce. The mozzarella should be spread generously but not too thick to allow the sauce and crust to shine through.
- Basil Leaves:
Add fresh basil leaves on top of the pizza. You can either tear them into pieces or add them whole. Some prefer to add basil before baking, while others wait until the pizza is out of the oven, to keep the leaves vibrant and fresh.

Step 5: Bake the Pizza
- Place the pizza in the preheated oven and bake for about 10-12 minutes, or until the crust is golden and crispy, and the cheese is bubbling and slightly browned. The exact baking time can vary depending on your oven, so keep an eye on it.
Step 6: Finish and Serve
- Add Final Touches:
- After baking, remove the pizza from the oven. Drizzle a little extra virgin olive oil over the top for a rich, glossy finish. Sprinkle with a pinch of salt and pepper, and, if you prefer, add more fresh basil leaves.
- Slice and Enjoy:
- Allow the pizza to cool for a few minutes before slicing. This will help the cheese set and prevent the toppings from sliding off. Serve your pizza Margherita with a simple salad or a glass of wine for the ultimate Italian experience!

Tips for the Perfect Pizza Margherita:
- Use Fresh Mozzarella: The quality of mozzarella is key to a delicious pizza. Buffalo mozzarella has a creamier texture and richer flavor, but regular cow’s milk mozzarella will work as well.
- High-Quality Tomato Sauce: Since this pizza is so simple, the tomato sauce really matters. Opt for San Marzano tomatoes, which are known for their sweet, balanced flavor. You can blend them with a pinch of salt and a little olive oil for a quick homemade sauce.
- Don’t Overload with Toppings: The beauty of a Margherita pizza lies in its simplicity. Resist the urge to add extra toppings; stick with the classic ingredients to get that authentic taste.
- Bake on a Pizza Stone: For a crispier crust, use a pizza stone, which will mimic the high heat of a pizza oven and give your pizza that pizzeria-style finish.
- Fresh Basil Last: If you’re unsure whether to add the basil before or after baking, try adding it after baking to preserve its fresh, fragrant flavor.

Conclusion:
Pizza Margherita is more than just a dish—it’s an Italianhttps://ladycooking.com/2024/12/28/the-worlds-best-cuisines/ classic that celebrates the beauty of fresh, quality ingredients. By following these steps, you’ll be able to create a delicious pizza with a crispy crust, creamy mozzarella, tangy tomato sauce, and aromatic basil. Perfect for any pizza night, Pizza Margherita is sure to satisfy your cravings and impress your guests!